
How I got my nail pics from a 3 to a strong 8 (with zero photography skills!)

My favourite blog posts are the ones where I actually get to make, build, or do stuff. So I knew that this was going to be a fun one. I decided to do a blog post about this not only because it’s fun, but because I believe that taking great pics of your work is what sets the top-level nail studios apart on social media.
It takes a little bit of time, but I truly believe that taking great pictures is one of the best things you can do for your marketing, your brand, and ultimately for growing your nail business.
Not only does it show your work in the best light, it also catches the eye of people scrolling on Instagram. Professional pictures give you a step up in looking polished, professional, and skilled.
So I put different techniques to the test to see what works best for photos. I tried different lighting styles, poses, cameras… I even made a lightbox (so much fun!)
In this blog post I’ll give you some tips and ideas to up your Instagram nail pic game, no matter what your level, and help you get noticed.
Oh, and by the way… pictures are very subjective. Everyone has their own style and preference. There is absolutely no wrong or right way to take photos. I hope you can see this post as inspiration and not a rulebook.
Okay, let’s dig in!
The misconception about nail pictures on Instagram
Facebook and Instagram are huge for building up a portfolio of your best work. Potential clients and current clients love getting inspired and wowed by your nails. I barely ever get my nails done, and I seriously can’t get enough of nailfies (is that a word?)
But I think that there is a misconception about the real purpose behind your nail work and pictures.
If you’re a salon looking to capture the eye of clients, you’re not competing with other nails techs. You’re not looking to show off a technique that other nail techs don’t know how to do.
The average person (aka potential client) just wants to see pretty pictures of nails. They probably don’t care much about the details that you obsess over.
The most important thing is to make your pictures relatable, high-quality, and consistent.
Relatable means this: your nail pics shouldn’t necessarily look like they were taken at a nail salon. Make them look like an everyday person who’s showing off their nails to their friends. Make them a little unique and different instead of your standard “nail salon pose”.
High-quality means this: Good lighting, good camera, good poses. In that order. If there is one thing I’ve learned about nail pictures from this blog post: lighting is EVERYTHING. After that it also helps to have a good camera and finally good poses.
Consistent means this: Especially on Instagram, you want all your photos to speak to your brand. When people see them, even without a watermark or your logo, they know it’s you. So take lots of pics and develop your own style and “trademark” when it comes to taking pictures.
I’ll cover more of these things going forward.
Lighting: the holy grail of awesome photos
If there is one single lesson I’ve learned it’s this: you need light, and lots of it. More light than you probably think you need.
Do not take pictures indoors without an extra source of light, whether that’s a window, a close lamp, or a ring light! Just don’t do it!
With that said, I thought I’d experiment with different types of lighting to see what effect it has on my pictures.
First I started with a simple camera flash:
Honestly this just makes my hand look creepy. The picture looks flat and lifeless with weird shadows.
Verdict? Please don’t use a camera flash for your nail pictures. It makes them look creepy.
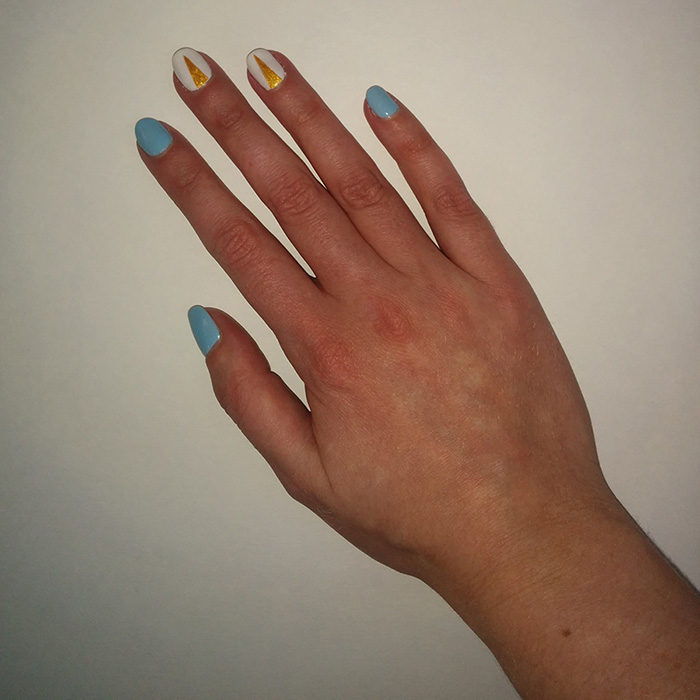
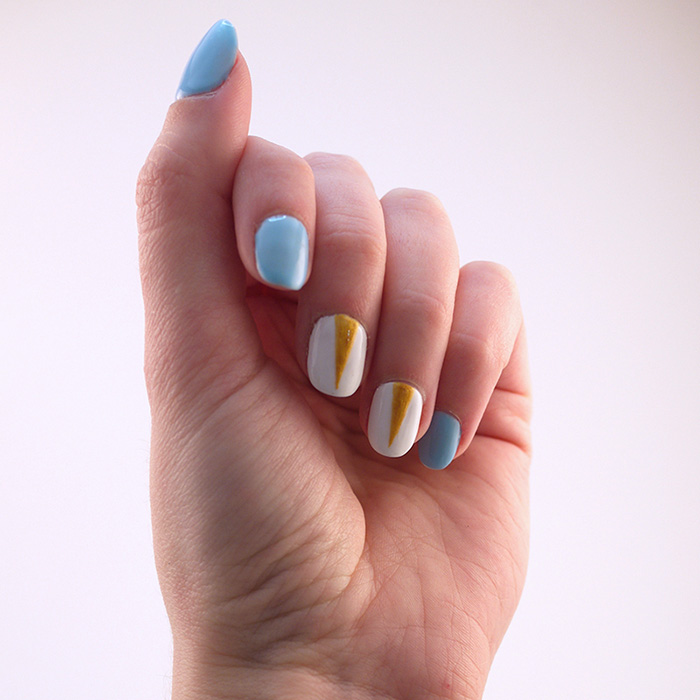
Then I tried natural lighting:
My office has massive windows so it’s the perfect spot to get lots of indirect sunlight. And as you can see, the result is completely different from a camera flash.
I like this picture because it doesn’t look like a classic “nail salon” picture. This could be taken anywhere. It’s more like a lifestyle shot.
Verdict? If you’ve got big windows in your salon, use them! Natural lighting looks great.
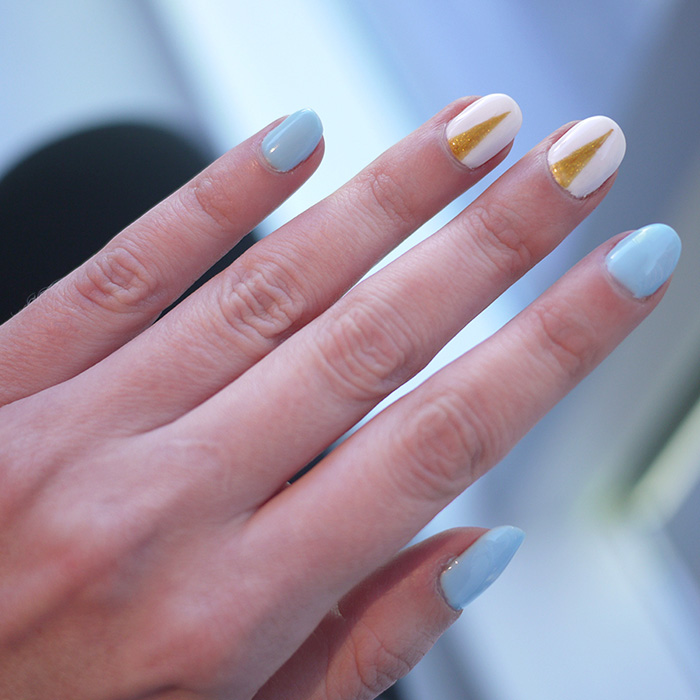
And why not? I bought a mini ring light off Amazon:

Since everyone else is doing it, I caved and bought an $18 ring light off Amazon. The result is actually kind of cool. I like how the light makes the nails look shinier with a nice reflection. Just be sure to move the nails around until they catch the light.
Verdict? I definitely recommend trying a ring light, but don’t use it as your only source of light - it’s not bright enough. Use it with another light source like a window or lamp.
Finally, I did a craft project and made a simple DIY light box (so fun!):
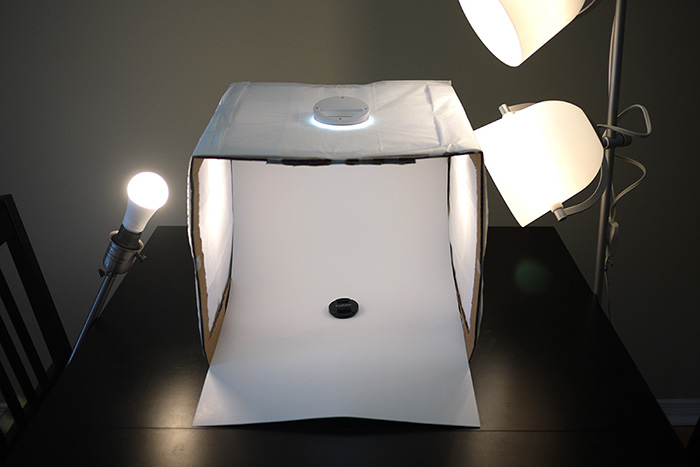
[My beautiful light box]
This weekend I went full-on Martha Stewart and made myself a light box, which I’m weirdly proud of.
The purpose of a light box is to have a space with a blank background that diffuses light and gives your pictures a soft glow, as opposed to putting lamps directly above the hands.
I used a cardboard box, white tissue paper and white bristol board following this tutorial.
The results were definitely interesting:

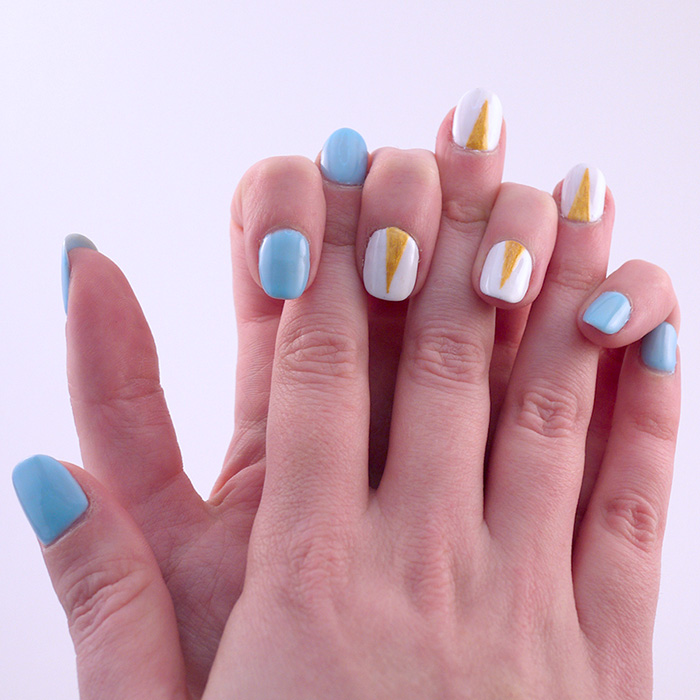
I personally really like the effect of the light box. I think the pictures look fresh, professional and different from the average nail pic.
It’s also super easy to change the background to match your nail colours (I used turquoise tissue paper in the picture above).
However, posing hands inside a light box can be difficult, so it takes some time to get it right.
Verdict? A light box is a fun little project that can add some visual interest to your nail pictures. It can take time to get the right photos, but it’s definitely worth it.
To edit or not to edit… that is the question
This is a hot topic not just with nail techs, but hair salons, lash boutiques, brow studios…
"Should I edit pictures of my work? I don’t want them to look fake, or distorted, or different from real life!"
Long answer short: yes, you probably should edit your pictures, but don’t add filters.
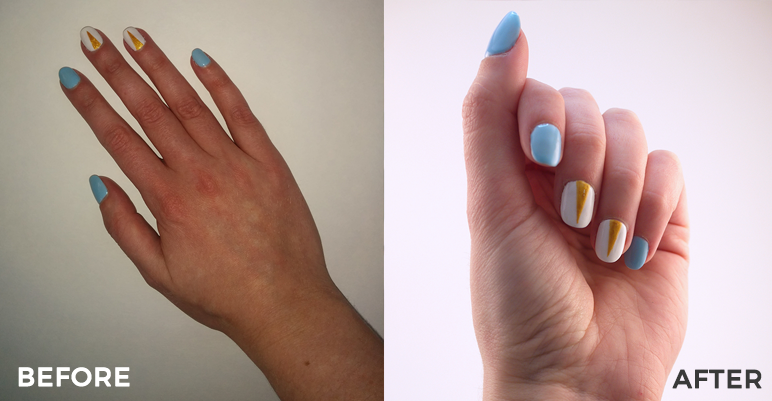
Here’s what my picture looks like before and after editing:
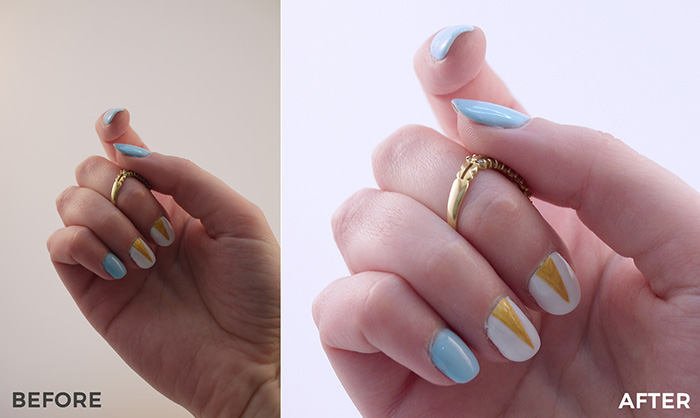
I took this basic photo and turned it up a notch by editing it slightly:
1) I cropped the picture to focus more on the nails, cut out my awkward hand wrinkles, and get a perfect square. Cropping pictures does wonders!
2) I made the picture brighter and removed the shadows by adjusting the lighting. I personally use Photoshop but you can easily use Snapseed which is a powerful photo editing app.
Cropping a picture is pretty simple. Where a lot of people get in trouble is editing the colours and adding filters. It’s kind of a grey area and it’s totally a matter of personal preference.
I recommend that you skip the classic photo filters and instead use the manual sliders on your editing app to strike a balance between “true to life” and “bright and fantastic”.
Making your hand poses look natural and interesting
For me, this was the most difficult part of this exercise. It was doubly hard because I was taking pictures of my own hands.
My biggest takeaway is that posing hands is not as easy as it looks!
1) It’s important to angle your hands so the nails catch the light and not the shadows
2) The “easiest” poses are the classic ones that so many nail salons use: posing one hand on top of the other, and the claw formation. Other poses require practise and creativity.
3) Adding in one single element hugely enhances a photo. A ring, a furry sweater, a coloured background. It makes it easier to pose around other objects.
I recommend having some objects, backgrounds and textures around your salon to incorporate into your pictures and make them punchier.
I even managed to make a glass of milk look cool!

When it comes to hand poses, it kind of goes back to the philosophy of your photos:
Do you want them to look like nail salon portfolio pics, or do you want them to look like creative lifestyle photos? Do you want the focus to be on your work, or on the photo as a branding tool?
There is no right or wrong answer. I personally prefer photos that are more original, but again it’s just a preference! Find your own style and go with it!
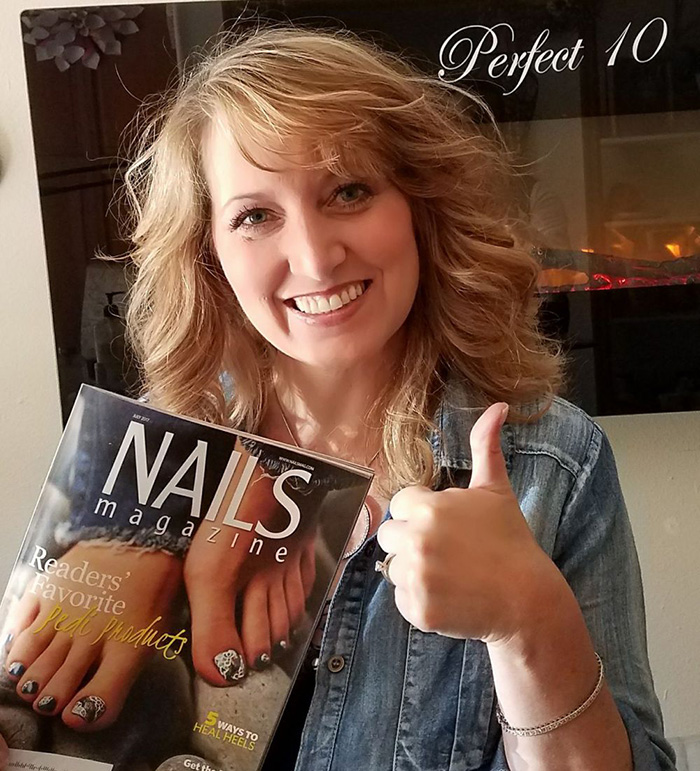
One nail professional’s take
I asked nail educator (Perfect 10 Nail Workshops) and all-around fantastic person Amy Masters for her opinion on nail pics. Here’s what she has to share.
"Capturing pictures is so important for so many reasons.
1. For yourself it's always fun too look back and see your growth in your portfolio. 2. To build a clientele with advertising 3. To get published and used with social media.
To capture a great nail pic, first nourish the cuticles to look moisturized. Pose the clients' hands to be flattering for their nail length and shape as some clients' fingers twist and turn. I prefer the fingers to be close together and up-close. This is the best way to showcase the nails!
Angling your camera is important as it can make the nails look stubby if it’s angled too high and can make them look oddly long if angled to low. Move the camera around to best capture the true look of the nails.
Lighting is also an important step. Halogen lamps mimic sunshine allowing the sparkle and halo of the glitters to shine and sparkle. After you’ve taken the picture, crop and add a frame and/or watermark to finish.
Post away and enjoy the feedback. I do not enhance or alter my pics in any way as I don’t want to mislead anyone about my work."
In conclusion
This blog post was not only fun, but super educational for me. Here are my biggest takeaways:
1) A professional camera (even one from 6 years ago) is so much better than a camera phone. I used an old Panasonic point and shoot camera, and it made such a difference.
2) A light box is easy to make and gives your pictures a professional edge. However, the end result is more of a focus on professional photography than on the nails.
3) Rings lights are a cheap and easy way to add some dazzle to nail pics.
4) A little bit of photo editing goes a long way. Even without filters which change nail colours, you can make your pictures look brighter and bring out the nice details. Also, editing a photo can be as simple as cropping it to make the focus on the nails (like I did in all my above pics).
5) Take loads of pictures so you can pick out the best ones.
6) I don’t think I’ll be doing any specialty nail art anytime soon. I’m so sick of these golden arrows 😃
Join my free advertising class for solo beauty pros!


